Cloudfront Web Portal Prerequisites
Admin Settings
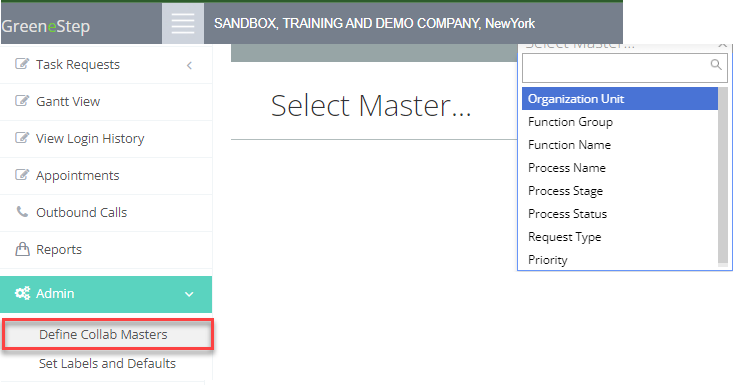
Define Collab Masters
- The Collab Master is the admin settings that is enabled only for the manager-level categories
- It is used to add or hide the field’s option in the master’s dropdown
- Click on “Define Collab Menu” and select the required Master from the dropdown on the right corner
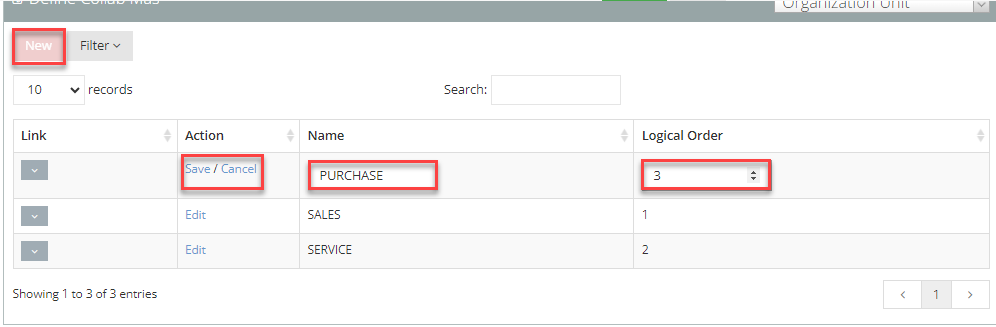
- Click on the “Edit” option to change the existing name or click on the new option to create a new field name
- Edit > Provide Name > Logical Order > Click on save
- The column name with “Link” consists of a dropdown which is used to hide the rows
- The Filter option allows the user to view active and hidden rows and unhide the hidden rows
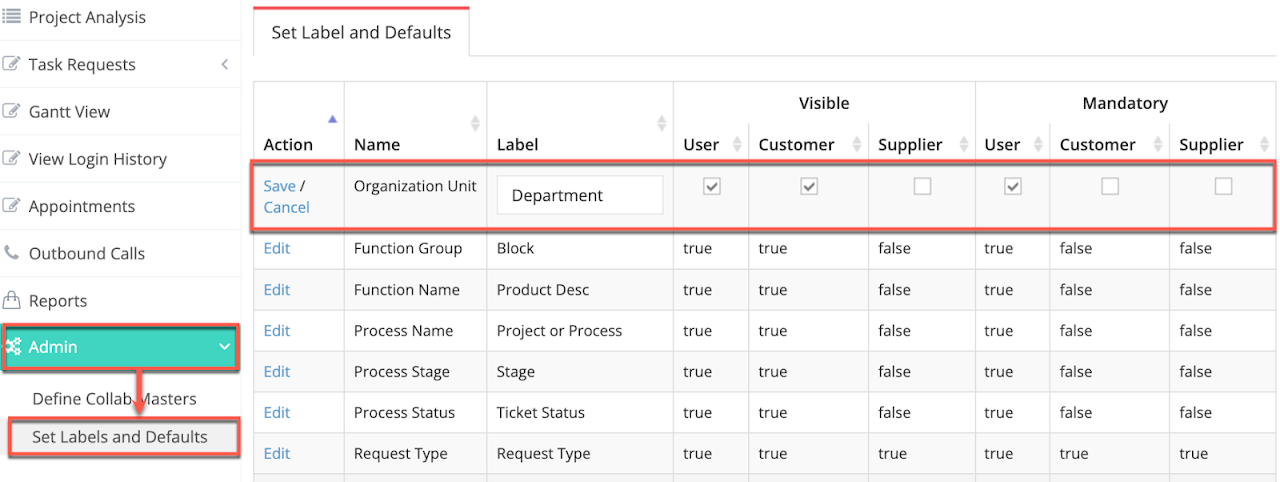
Set Labels and Defaults
- This menu is used to change the master’s label name, make them visible, enable, and mandatory by selecting the respective checkbox
- Click on “Edit” > change the label name if required > unselect the respective checkbox if it should not be visible or enable or mandatory
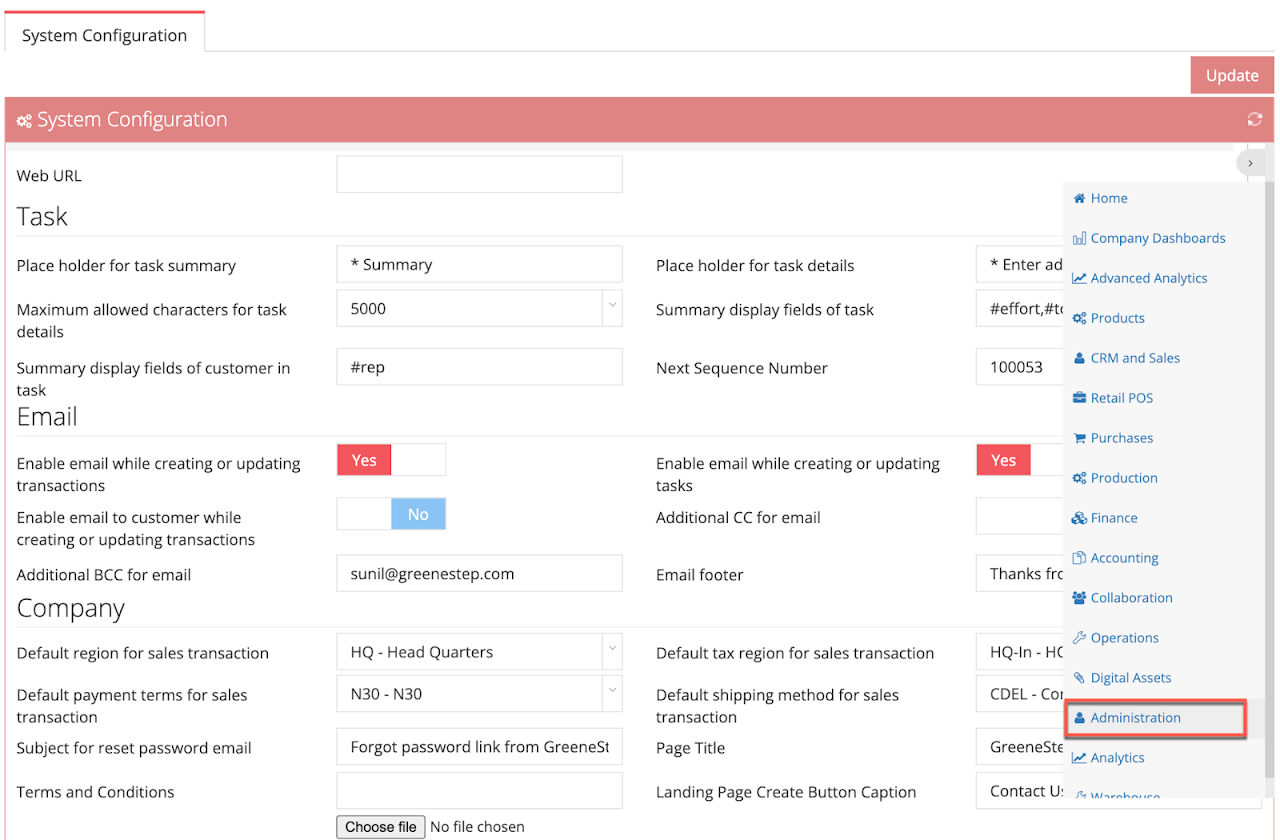
CFx Customer Portal Settings on Web
- The customer portal settings are the predefined settings that can be restricted or enabled for the respective users
In the GreeneStep BackOffice
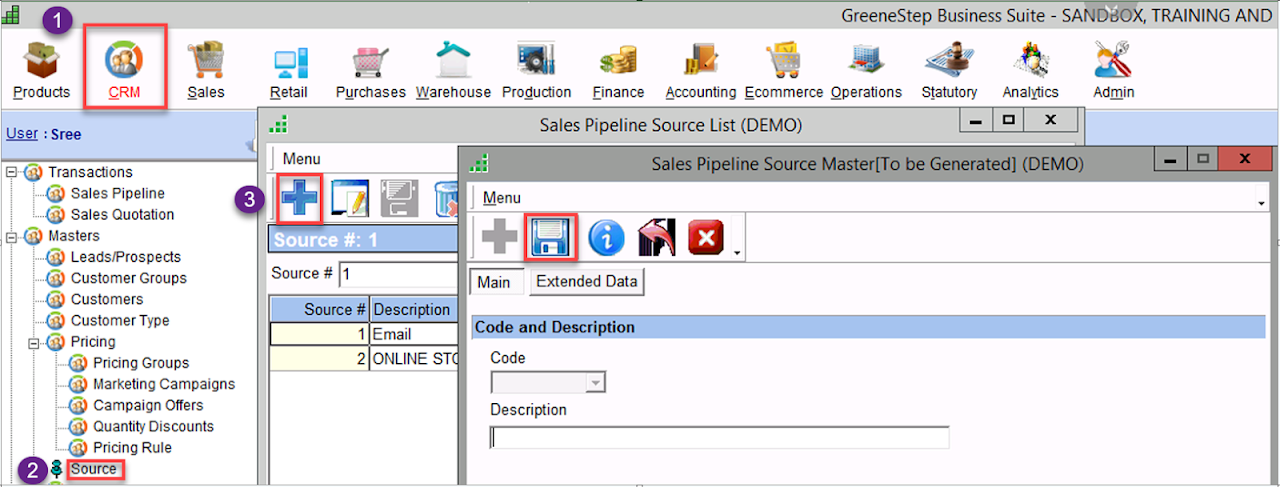
Source Master
Menu Path: CRM > Source > New > Code and Description > Save
- The Source master can be used to identify the lead’s source
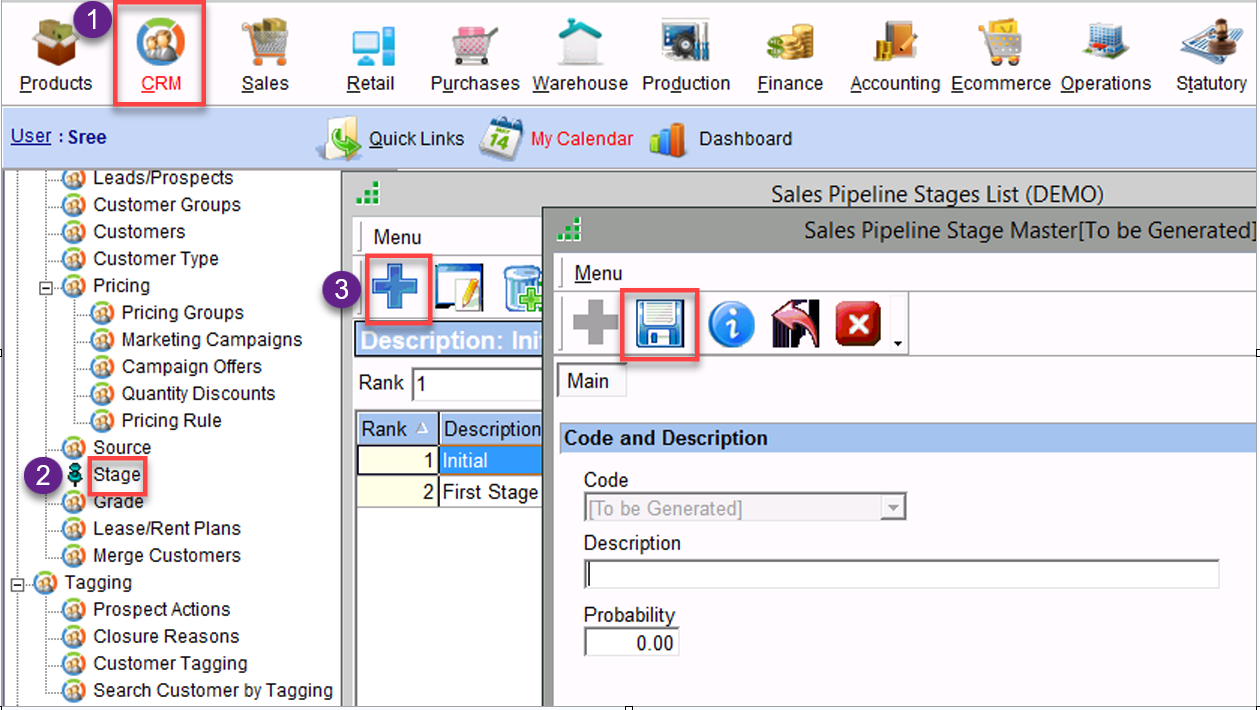
Stage Master
Menu Path: CRM > Stage > New > Identity > Save
- The “Stage” master is used to set the stages of the prospect at each level
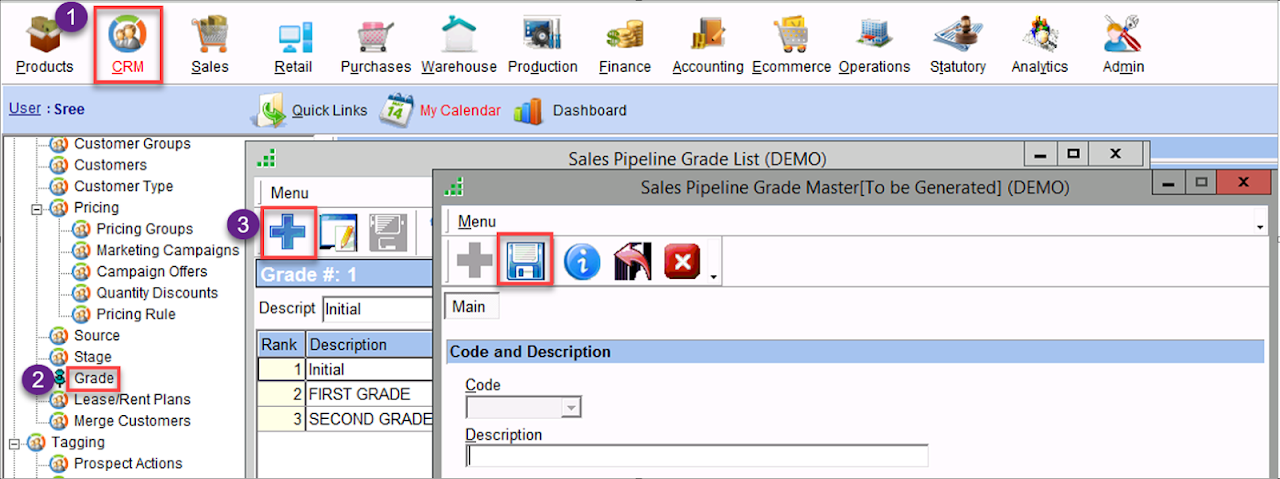
Grade Master
Menu Path: CRM > Grade > New > Code and Description > Save
- The “Grade” master is used to mark the customer based on services or types
Prospect Action Setup
- The Prospect Action is used to create multiple groups and their selection to check with the prospect’s stage or position
- For example, when a sales rep contacts the prospect, he can update the stage on whether the prospect is interested, and their feedback and responses can be captured according to the conversation
Prospect/Customer Action Group Creation
>> CRM > Prospect Actions > New > Description > Save
- Click on the “New” option to create a new Prospect Action Group
- Enter the group description and click on the save option button
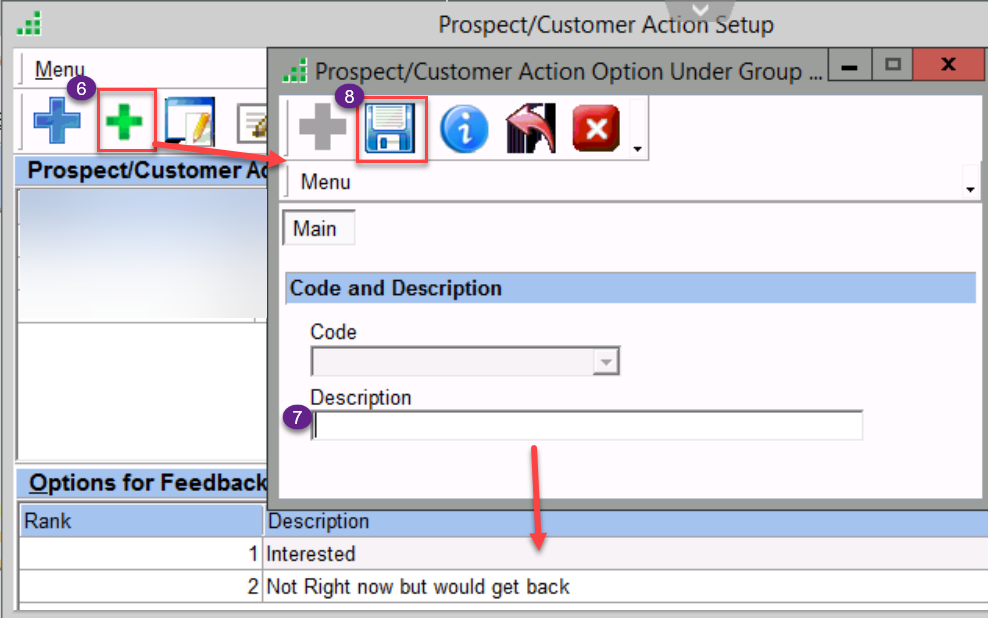
New Selection Creation
Menu Path: CRM > Prospect Actions > New > Description > Save
- Click on the “New” option to create a “selection” under each action group
- Select the particular group and click on the create selection option button to add dropdown options for each group
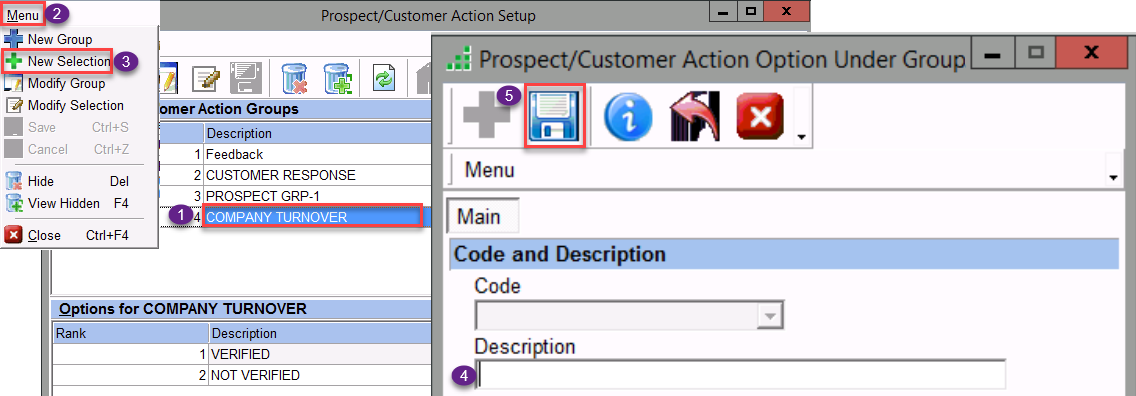
Method-2
Creation of selection
Menu Path: CRM > Prospect Actions > Select the required Group > Menu > New selection > Enter the Description to display > Save
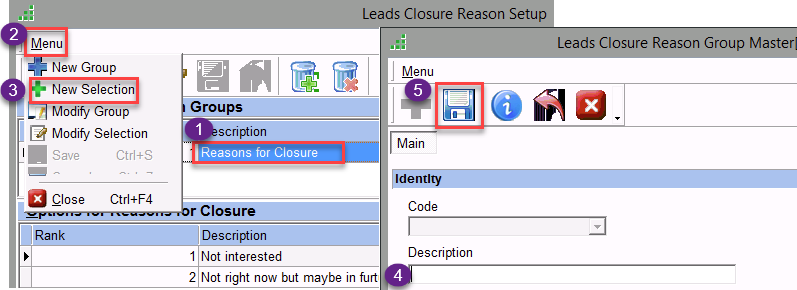
Closure Reasons Master Setup
- The closure option is used to close the lead by selecting the lead closure group master
- For example, when the sales rep contacts the prospect for closure, he can select the appropriate group and selection option for closure
- Customers can be deleted by converting the customer to prospect, deleting the converted prospect to delete the customer permanently
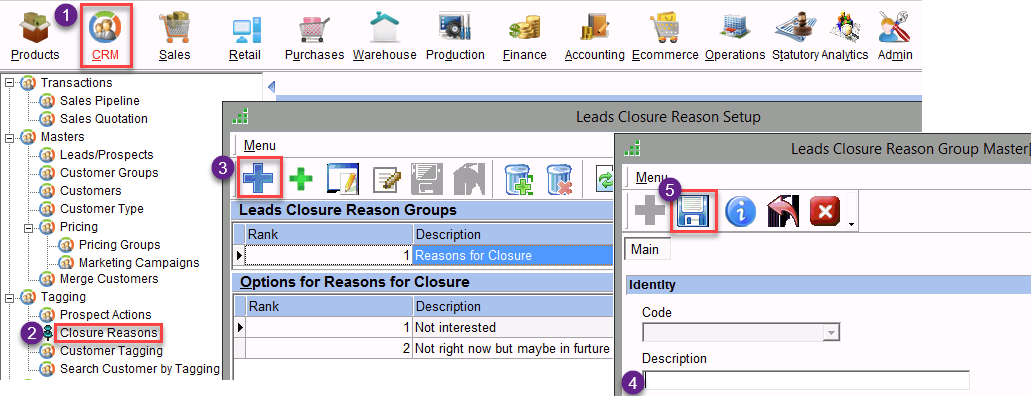
Creation of Lead Closure Reason Group
Menu Path: CRM > Closure Reasons > New Group > Description > Save
- Click on the new option to create a new closure group and provide the description to display
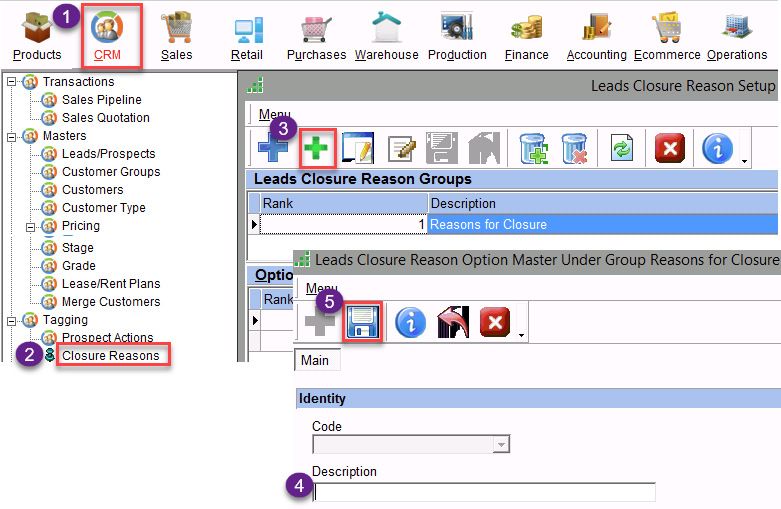
Creation of Selections under a closure group
Menu Path: CRM > Closure Reasons > New Selection > Description > Save
- Click on the “New” option to create a “selection” under each action group
- Select the particular group and click on the create selection option button to add dropdown options for each group
Method-2
Creation of selection
Menu Path: Closure Reasons > Lead closure Setup > Select the Group > Menu > New selection > Code and Description > Save
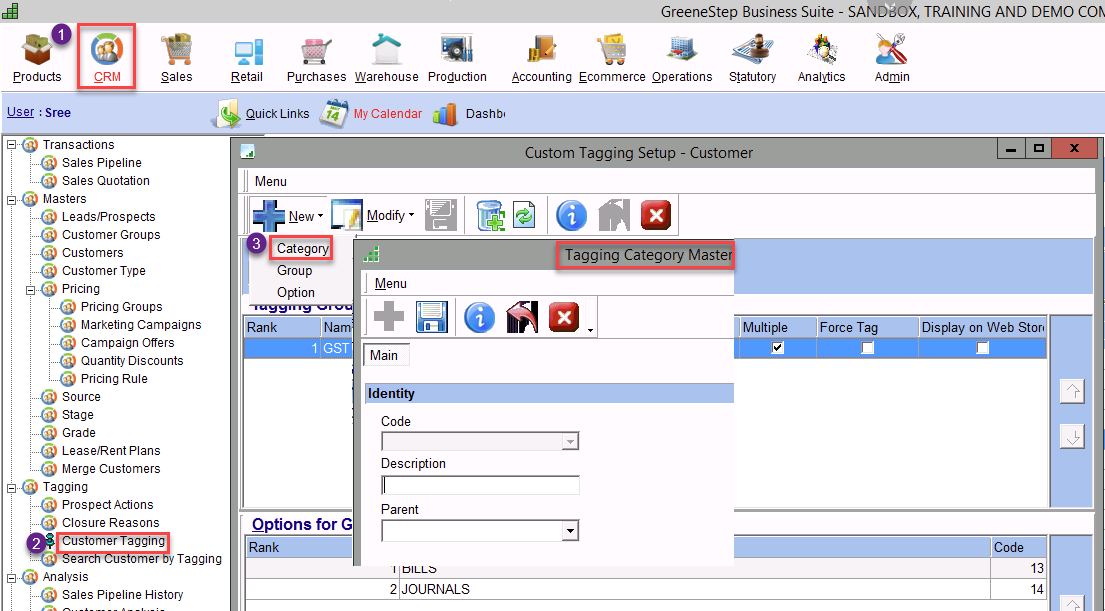
Customer Tagging Setup
- Customer Tagging is used to create a category with several groups and options
- For example when a sales rep can get additional details, from the customer, based on the inputs by selecting a particular category, choosing different groups, and checking the respective option
Custom Category Creation
Menu Path: CRM > Customer Tagging > Customer Tagging Setup > Category > Tagging Category Master > save
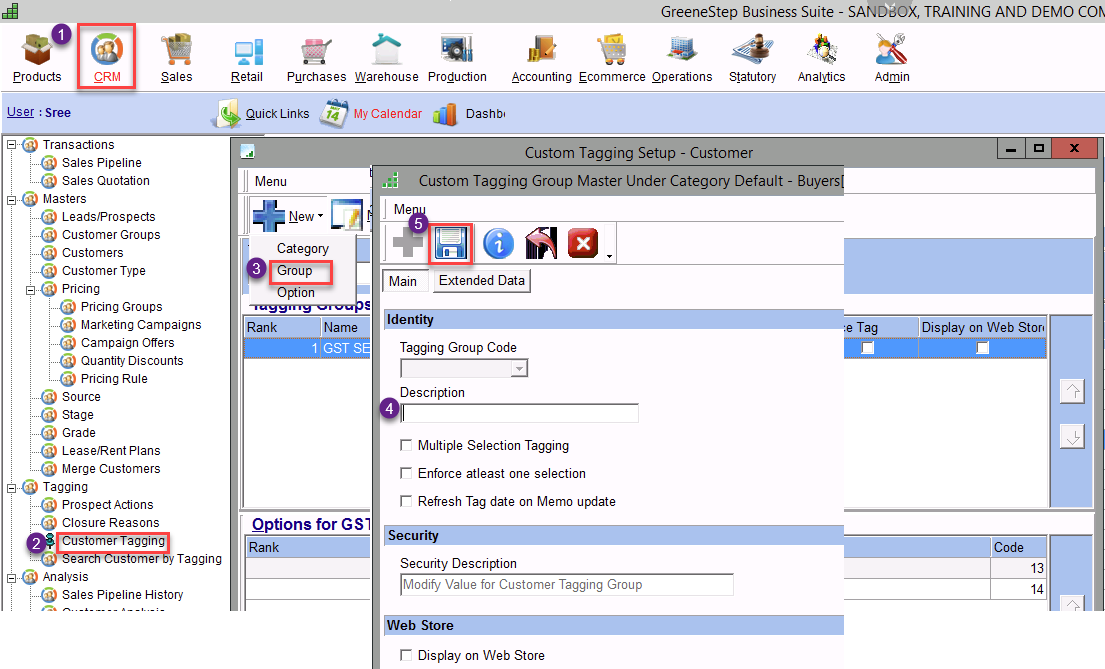
Group Creation
Menu Path: CRM > Customer Tagging > Customer Tagging Setup > Group > Custom Tagging Group Under Master > save
- Select the category and create a new group to tag under the particular category
Option Creation
Menu Path: CRM > Customer Tagging > Customer Tagging Setup > Option > Description> save
- Several “Options” are created under each group tagged to a particular category
- The options are used as a checklist for the sales rep to mark at each stage

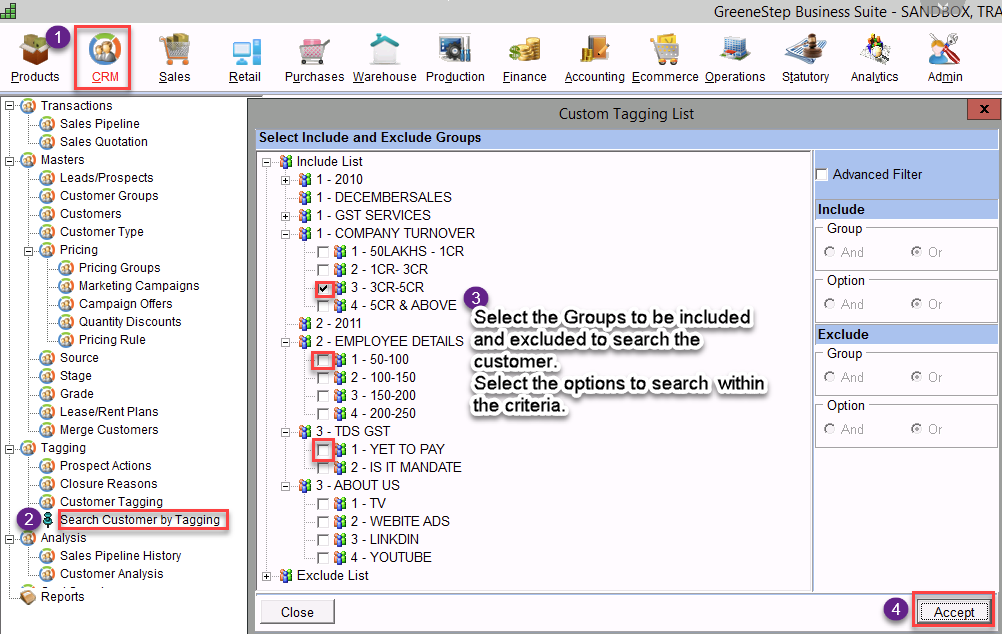
Search Customer by Tagging
- The “Search Customer by Tagging” menu is used to search the tagged customer based on the search criteria
Menu Path: CRM > Search Customer by Tagging > Select the Group and Option to be included in the search criteria > Accept